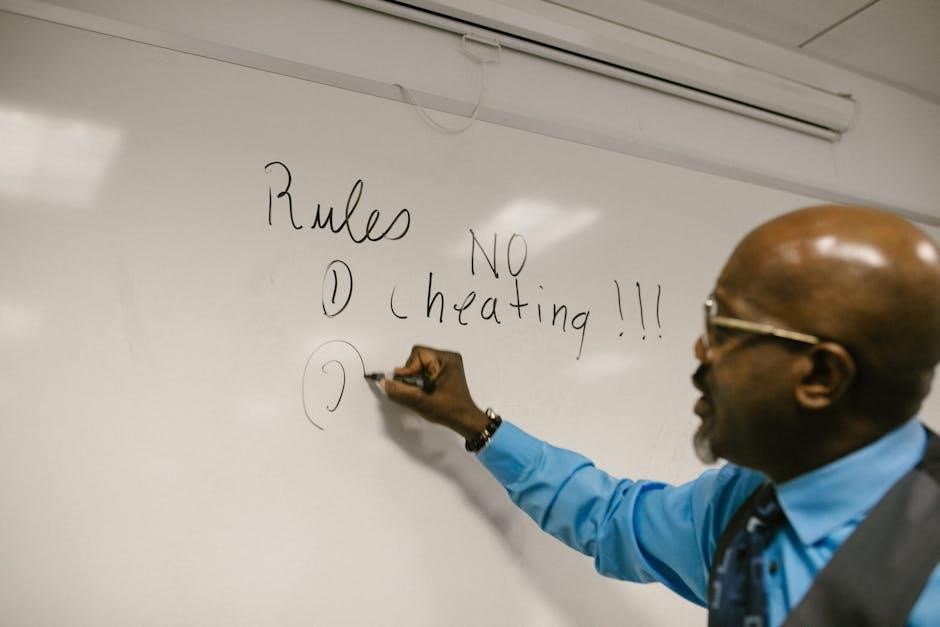
Effective literacy instruction adapts to diverse learner needs, ensuring all students access engaging materials and strategies. It’s about tailoring approaches,
considering abilities and comprehension, to foster a love for reading and writing.

The Importance of Universal Literacy
Universal literacy is foundational for individual success and societal progress. It empowers individuals to participate fully in civic life, pursue educational and employment opportunities, and navigate an increasingly complex world. Literacy extends beyond simply decoding text; it encompasses critical thinking, problem-solving, and effective communication skills.
When literacy instruction is universally accessible and effective, it reduces achievement gaps and promotes equity. Adapting instructional strategies to meet diverse learner needs – as highlighted by differentiation principles – is crucial. This means recognizing that students learn at different paces and in different ways, requiring tailored approaches to ensure comprehension and engagement.
Furthermore, a strong emphasis on literacy fosters a lifelong love of learning, enabling individuals to continue growing and adapting throughout their lives. Investing in universal literacy is, therefore, an investment in a brighter future for all.
Defining Literacy in the 21st Century
Literacy in the 21st century transcends traditional reading and writing skills. It now encompasses a broader range of abilities, including digital literacy, information literacy, and critical media consumption. Students must be able to navigate, evaluate, and create information using various technologies and platforms.
This expanded definition requires educators to move beyond rote memorization and focus on developing students’ abilities to analyze, synthesize, and apply knowledge in real-world contexts. Effective instruction incorporates diverse texts – both print and digital – and encourages students to engage with information actively and critically.
Furthermore, 21st-century literacy demands adaptability and a willingness to learn continuously. Instruction should foster these qualities, preparing students to be lifelong learners capable of thriving in a rapidly changing world. Differentiation, tailoring instruction to individual needs, is paramount in achieving this goal.
Understanding Diverse Learner Needs
Recognizing varied learning profiles – including dyslexia, ELLs, and learning disabilities – is crucial. Tailored instruction, acknowledging strengths and challenges, unlocks potential for all students.
Students with Dyslexia
Dyslexia presents unique challenges in decoding and language processing, but it doesn’t diminish intelligence. Effective literacy instruction for these students requires a structured, multi-sensory approach. This includes explicit phonics instruction, focusing on the sound-symbol relationship, and providing ample opportunities for practice.
Utilizing assistive technology, such as text-to-speech software, can significantly aid comprehension and reduce reading frustration. Breaking down tasks into smaller, manageable steps and offering extended time are also beneficial strategies. A key element is fostering a supportive classroom environment where students feel comfortable taking risks and asking for help.
Remember, dyslexia is a spectrum; individualized instruction is paramount. Focus on strengths, build confidence, and celebrate progress. Early identification and intervention are critical for maximizing a student’s literacy potential, allowing them to thrive academically.
English Language Learners (ELLs)
Supporting English Language Learners (ELLs) in literacy requires acknowledging their existing linguistic and cultural backgrounds. Instruction should build upon these strengths, rather than attempting to erase them. Scaffolding is crucial – providing temporary support that is gradually removed as proficiency increases.
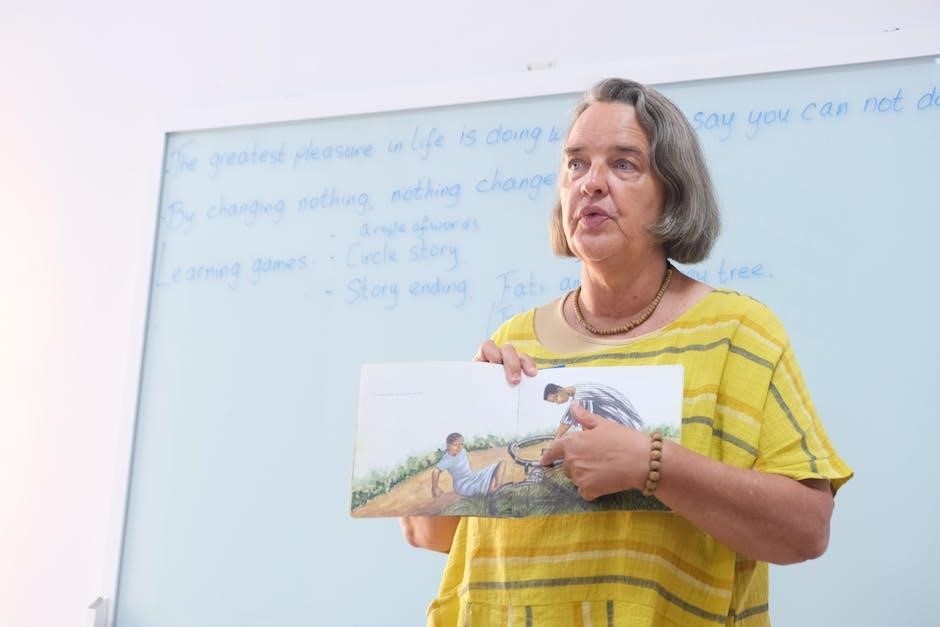
Visual aids, graphic organizers, and realia (real-life objects) can enhance comprehension. Explicitly teaching vocabulary in context, alongside opportunities for repeated exposure, is essential. Allowing students to respond in multiple modalities – drawing, speaking, acting – reduces pressure and encourages participation.
Culturally responsive texts that reflect diverse experiences foster engagement and connection. Collaborative learning activities, where ELLs can learn from peers, are also highly effective. Remember to differentiate instruction based on English proficiency levels, providing targeted support where needed to ensure equitable access to literacy.

Students with Learning Disabilities
Literacy instruction for students with learning disabilities necessitates a multi-sensory, structured approach. Direct and explicit teaching of foundational skills – phonological awareness, phonics, and fluency – is paramount. Breaking down complex tasks into smaller, manageable steps, and providing ample opportunities for practice, is crucial for success.
Assistive technology plays a vital role, offering tools like text-to-speech software, graphic organizers, and speech-to-text programs. Individualized Education Programs (IEPs) should guide instruction, outlining specific accommodations and modifications. Frequent formative assessment allows for ongoing monitoring and adjustments to meet individual needs.
A strengths-based approach focuses on what students can do, building confidence and motivation. Creating a supportive and inclusive classroom environment, free from stigma, is essential. Remember that learning disabilities are not indicative of intelligence, but rather differences in how information is processed.
Gifted and Talented Learners
Literacy instruction for gifted and talented students requires enrichment and acceleration beyond the core curriculum. These learners often demonstrate advanced vocabulary, rapid reading rates, and sophisticated comprehension skills, needing opportunities to explore complex texts and concepts.
Differentiated instruction should include tiered assignments, allowing students to tackle challenging tasks at their appropriate level. Independent study projects, research opportunities, and creative writing endeavors foster intellectual curiosity and critical thinking. Encourage exploration of diverse genres and perspectives.
Mentorship programs and connections with experts in various fields can further stimulate their learning. Focus on developing higher-order thinking skills – analysis, synthesis, and evaluation – rather than simply covering material quickly. Providing choice and autonomy in learning empowers these students to take ownership of their education.

Foundational Literacy Skills
Strong foundations in phonological awareness, phonics, fluency, vocabulary, and comprehension are crucial for all learners. These skills build a base for reading success.
Phonological Awareness
Phonological awareness encompasses the broad skill of recognizing and manipulating the sounds of spoken language. This is a critical precursor to phonics and reading success, extending beyond simply identifying rhymes. Instruction should begin with larger units of sound – words and syllables – before progressing to individual phonemes (the smallest units of sound).
Activities might include clapping out syllables in words, identifying beginning and ending sounds, blending sounds to form words, and segmenting words into individual sounds. Explicit and systematic instruction is vital, particularly for students at risk for reading difficulties. Games and playful activities can make phonological awareness practice engaging and effective. Regular assessment helps monitor progress and adjust instruction accordingly, ensuring all students develop this foundational skill.
Phonics Instruction
Phonics instruction systematically connects letters and letter combinations to the sounds they represent, enabling decoding skills. A sequential approach is key, starting with simple consonant-vowel-consonant (CVC) words and gradually introducing more complex patterns like digraphs, blends, and vowel teams.
Effective phonics lessons are explicit, providing clear explanations and ample opportunities for practice. Activities should include blending sounds to read words, segmenting words to spell, and manipulating sounds to create new words. Multi-sensory techniques, like using letter tiles or sand trays, can enhance learning. Regular review and application in connected text are crucial for solidifying skills. Differentiated instruction ensures all learners, including those with dyslexia or ELLs, receive appropriate support to master phonics concepts.
Fluency Development
Fluency extends beyond simply reading quickly; it encompasses accuracy, rate, and prosody – reading with expression. Developing fluency requires repeated, supported reading practice. Students benefit from reading the same text multiple times, with opportunities for feedback and refinement.
Strategies like choral reading, echo reading, and paired reading provide supportive environments for building confidence and automaticity. Teachers should model fluent reading, demonstrating appropriate pacing and phrasing. Monitoring progress through oral reading assessments helps identify areas needing support. Addressing decoding difficulties is paramount, as inaccurate decoding hinders fluency. Fluency practice should be integrated with comprehension activities, ensuring students understand what they are reading, not just reading quickly.
Vocabulary Acquisition
Robust vocabulary knowledge is crucial for reading comprehension. Effective vocabulary instruction moves beyond rote memorization of definitions; it focuses on depth of understanding and application in context. Explicit instruction should introduce new words systematically, alongside multiple exposures in varied contexts.
Strategies like morphemic analysis (understanding prefixes, suffixes, and root words) and contextualization help students decipher unfamiliar words. Encouraging students to create their own definitions, use words in sentences, and engage in word games fosters retention. Wide reading plays a significant role, exposing students to a broader range of vocabulary organically. Teachers should also pre-teach key vocabulary before reading complex texts, and regularly review previously learned words to reinforce understanding. Connecting new words to students’ prior knowledge is also essential;
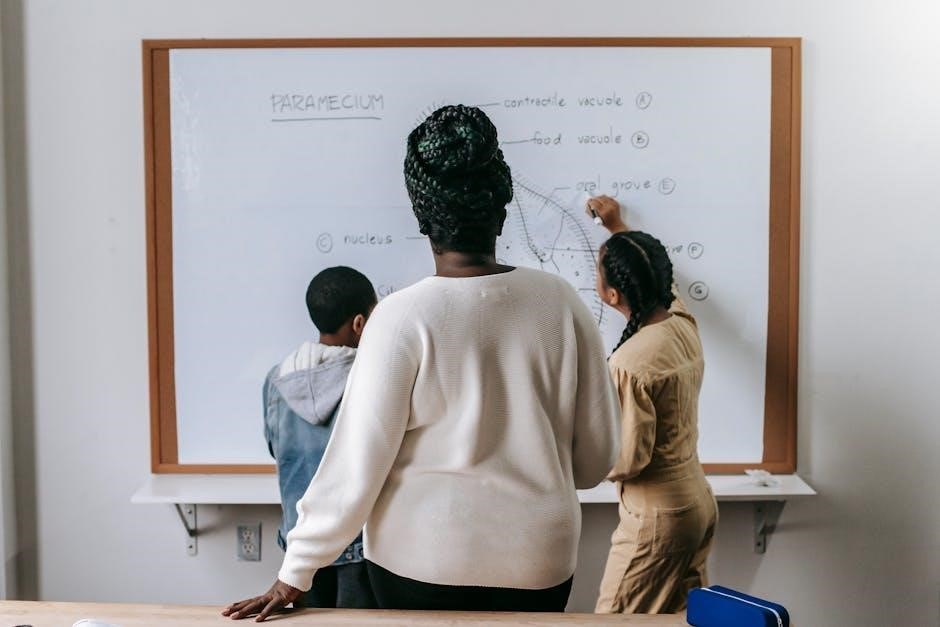
Comprehension Strategies
Developing strong comprehension skills empowers students to actively engage with texts. Explicitly teaching strategies like predicting, questioning, clarifying, and summarizing equips learners to construct meaning. Modeling these strategies – “thinking aloud” while reading – demonstrates their application for students.
Encourage students to monitor their understanding by asking themselves questions throughout the reading process. Visualizing, making connections (text-to-self, text-to-text, text-to-world), and identifying the main idea are also vital. Graphic organizers, such as story maps and Venn diagrams, can aid in organizing thoughts and understanding relationships within the text. Furthermore, fostering discussions about the text allows students to share interpretations and deepen their comprehension. Regularly practicing these strategies across various genres builds confident, capable readers.

Differentiated Instruction for Literacy
Differentiated instruction tailors learning to individual needs, adapting strategies based on abilities and comprehension. This ensures all students are challenged and supported effectively.
Assessment-Driven Differentiation
Assessment is the cornerstone of effective differentiated literacy instruction. It moves beyond simply assigning grades; instead, it provides crucial insights into each student’s current understanding and skill level. Frequent formative assessments – observations, quick checks for understanding, exit tickets – reveal learning gaps and strengths in real-time.
These assessments inform instructional decisions, allowing teachers to adjust the complexity of texts, the level of support provided, and the types of tasks assigned. For example, a student struggling with decoding might receive targeted phonics instruction, while a more advanced reader could engage with challenging extension activities.
Utilizing data from both formal and informal assessments ensures that differentiation isn’t arbitrary but is directly responsive to individual student needs, maximizing learning potential for all. This cyclical process of assess, plan, teach, and reassess is vital for continuous improvement.
Tiered Assignments
Tiered assignments offer different pathways to understanding the same core concepts and skills within literacy instruction. This differentiation strategy involves creating tasks that vary in complexity, abstractness, and the level of support provided, catering to diverse learner needs. All tiers address the same learning objective, but the expectations for each tier are adjusted.
For instance, when analyzing a poem, one tier might focus on identifying basic rhyme schemes, while another requires students to analyze figurative language and thematic elements. A third tier could involve composing their own poems inspired by the original.
Effective tiered assignments ensure that all students are challenged appropriately, preventing frustration for struggling learners and boredom for advanced students. Careful planning and clear expectations for each tier are essential for successful implementation, fostering a growth mindset for all.
Flexible Grouping
Flexible grouping is a dynamic approach to organizing students for literacy instruction based on their current skills and needs, rather than fixed ability levels. Unlike traditional grouping methods, flexible groups are fluid and change frequently based on ongoing assessment data. This allows teachers to target instruction more effectively.
Groups can be formed for specific skills – like phonics practice, guided reading at a particular level, or collaborative writing projects. Students might be grouped by shared interests for literature circles, or randomly for peer editing.
The key is responsiveness; teachers observe student performance and adjust groupings accordingly. This ensures that all learners receive appropriate support and challenge, promoting growth and collaboration. Flexible grouping maximizes instructional time and fosters a sense of community within the classroom.
Choice Boards & Learning Centers

Choice boards and learning centers empower students to take ownership of their literacy learning, fostering engagement and differentiation. Choice boards present students with a variety of activities – reading responses, writing prompts, vocabulary exercises – all addressing the same learning objective, but allowing for varied expression.
Learning centers, similarly, offer designated spaces within the classroom focused on specific skills or themes. These might include a writing center, a listening center with audiobooks, or a word work station.
The benefit lies in catering to diverse learning styles and preferences. Students select activities that resonate with them, increasing motivation and promoting deeper understanding. This approach supports independent learning, encourages self-assessment, and allows teachers to provide targeted support where needed, creating a student-centered literacy environment.

Utilizing Technology in Literacy Instruction
Technology enhances literacy through assistive tools, digital resources, and interactive platforms. It provides personalized learning experiences, supporting diverse needs and fostering engagement for all students.
Assistive Technology for Struggling Readers
Assistive technology (AT) plays a crucial role in supporting struggling readers, bridging gaps and fostering independence. Text-to-speech software converts written words into audible speech, benefiting students with dyslexia or decoding difficulties. Speech-to-text tools allow students to dictate their thoughts, bypassing writing challenges.
Furthermore, features like adjustable font sizes, spacing, and color contrast enhance readability. Graphic organizers and mind-mapping software aid in comprehension and organization of ideas. Digital dictionaries and thesauruses provide immediate access to vocabulary support.
Effective implementation requires careful assessment to match the AT to the student’s specific needs. Training for both students and educators is essential to maximize the benefits. AT isn’t a replacement for explicit instruction, but a powerful supplement, empowering students to access and engage with literacy materials effectively.
Digital Literacy Tools
Digital literacy tools are transforming literacy instruction, offering dynamic and engaging learning experiences. Interactive ebooks with embedded multimedia enhance comprehension and motivation. Online reading platforms provide access to a vast library of texts, personalized reading recommendations, and progress monitoring.
Collaborative writing tools, such as Google Docs, facilitate peer feedback and shared authorship. Digital storytelling platforms empower students to create and share their own narratives, fostering creativity and communication skills. Online research databases provide access to credible information, promoting critical thinking and information literacy.
However, it’s crucial to select tools aligned with learning objectives and provide explicit instruction on their effective use. Digital equity must be addressed, ensuring all students have access to the necessary technology and internet connectivity. Integrating these tools thoughtfully enhances, rather than replaces, foundational literacy skills.
Interactive Reading Platforms
Interactive reading platforms represent a significant advancement in literacy instruction, offering personalized and engaging experiences for students. These platforms often feature adaptive reading levels, adjusting text complexity based on individual student performance, ensuring appropriate challenge and support.
Many platforms incorporate gamified elements, such as points, badges, and leaderboards, to motivate students and foster a love of reading. They frequently include built-in comprehension checks, allowing students to self-monitor their understanding and receive immediate feedback. Features like text-to-speech and adjustable font sizes enhance accessibility for diverse learners.
Furthermore, these platforms often provide teachers with valuable data on student reading habits and progress, informing instructional decisions. Examples include platforms offering curated book lists, virtual reading communities, and opportunities for students to respond to texts digitally, promoting critical thinking and discussion.

Creating a Literacy-Rich Classroom Environment
A literacy-rich classroom immerses students in language, featuring diverse texts and print. Culturally responsive materials and a welcoming atmosphere cultivate a genuine love of reading.
Print-Rich Environment
Creating a print-rich environment is fundamental to fostering literacy development. This extends beyond simply displaying the alphabet; it involves strategically surrounding students with a variety of print materials. Think labeled classroom objects, anchor charts displaying key concepts, and readily accessible books representing diverse genres and reading levels.
Word walls showcasing high-frequency words and vocabulary related to current units of study are incredibly beneficial. Student-created writing should be prominently displayed, celebrating their efforts and providing models for peers. Consider incorporating environmental print – real-world text from signs, labels, and packaging – to demonstrate the relevance of literacy outside the classroom.
Furthermore, a print-rich environment isn’t static. Regularly update displays, rotate books, and introduce new materials to maintain student engagement and continually expose them to language. This constant immersion in print reinforces letter-sound relationships, expands vocabulary, and cultivates a genuine love for reading and writing.
Culturally Responsive Texts
Integrating culturally responsive texts is crucial for equitable literacy instruction. Students are more engaged and comprehend better when they see themselves and their communities reflected in the literature they encounter. This means moving beyond traditional, Eurocentric narratives and actively seeking out books that represent diverse cultures, experiences, and perspectives.
These texts should authentically portray characters and storylines, avoiding stereotypes and promoting understanding. Consider authors from diverse backgrounds and stories that explore themes relevant to students’ lives. Furthermore, culturally responsive teaching involves validating students’ home languages and cultural knowledge, connecting texts to their prior experiences.
Providing choice in reading materials allows students to select texts that resonate with their identities and interests. This fosters a sense of belonging and empowers them as readers. Ultimately, utilizing culturally responsive texts builds confidence, expands worldview, and promotes a more inclusive and meaningful literacy experience for all learners.
Promoting a Love of Reading
Cultivating a genuine love of reading is paramount in literacy instruction. This extends beyond skill-building to fostering a positive emotional connection with books. Create a classroom environment where reading is valued, celebrated, and seen as a pleasurable activity, not a chore.
Offer a wide variety of reading materials – genres, formats, and reading levels – to cater to diverse interests. Implement regular read-alouds, showcasing engaging stories and modeling fluent reading. Encourage student choice in book selection, allowing them to explore their passions.
Book talks, author visits (virtual or in-person), and reading challenges can further ignite enthusiasm. Connect reading to real-world experiences and encourage students to share their thoughts and reactions. Remember, a lifelong love of reading is built on positive experiences and a sense of agency.