Possum Kingdom Fishing Guide: An Overview
Possum Kingdom Lake offers exceptional angling opportunities, boasting diverse species like Largemouth and Striped Bass.
Currently, fishing activity is high, with a favorable bite score, especially during early mornings and sunsets.
The annual Sand Bass run is underway, and the lake is experiencing post-spawn patterns for Largemouth Bass.
Water conditions are stained, with a temperature of 57 degrees and a level 2.78 feet below pool.
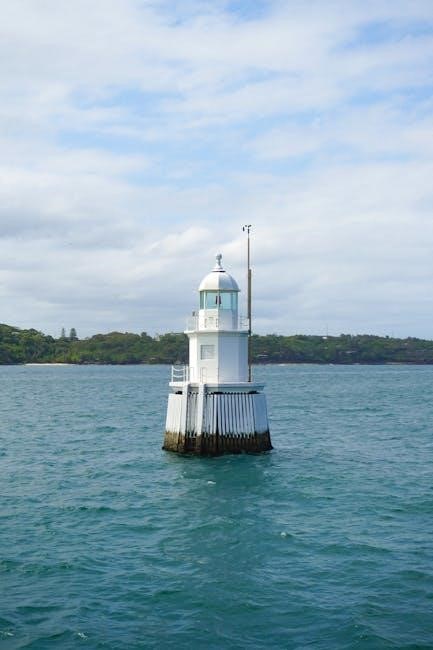
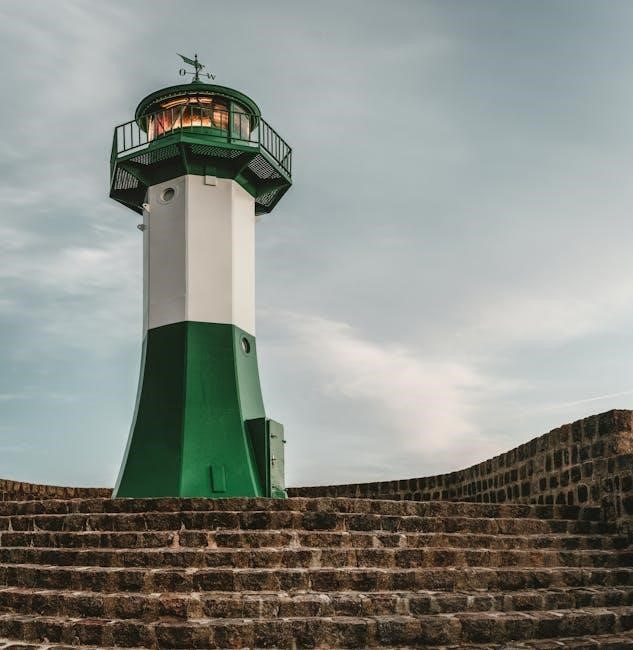
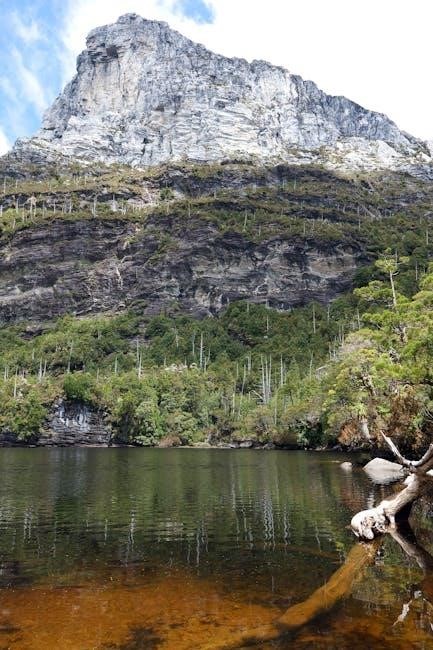
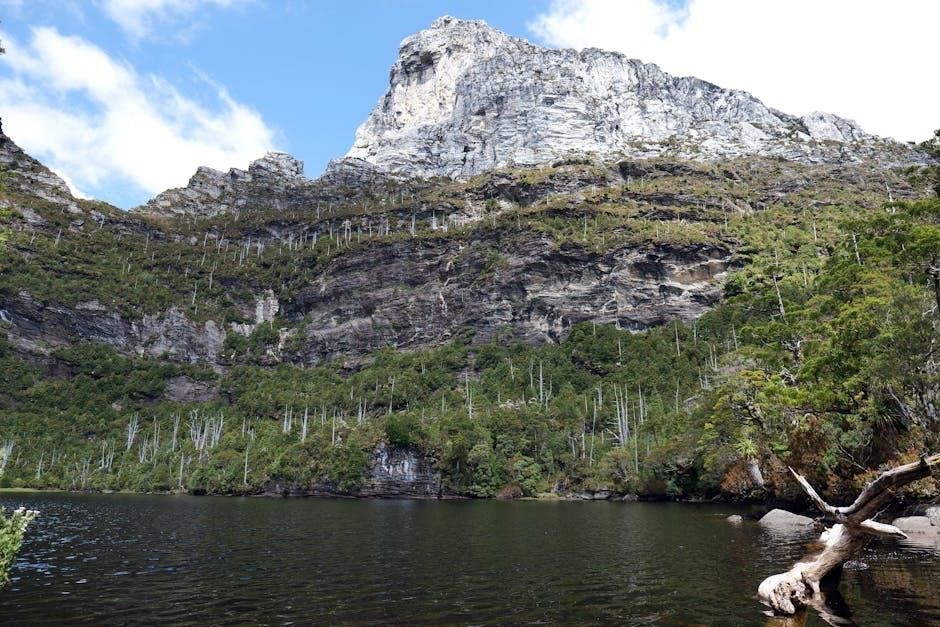
Possum Kingdom Lake, a stunning reservoir located in Palo Pinto County, Texas, is a premier destination for anglers seeking a diverse and rewarding fishing experience. Formed by the construction of the Possum Kingdom Dam on the Brazos River, this 20,000-acre lake is renowned for its clear waters, rugged shoreline, and abundant fish populations.
The lake’s unique topography, characterized by steep cliffs, rocky points, and submerged canyons, creates a complex underwater structure that provides ideal habitat for a variety of game fish. This structure, combined with consistent water levels and a thriving ecosystem, makes Possum Kingdom Lake a haven for both seasoned anglers and those new to the sport.
Popular species include Largemouth Bass, Striped Bass, and White Bass, attracting fishermen year-round. The lake’s reputation for producing trophy-sized fish, coupled with its scenic beauty, ensures a memorable outing for everyone. Whether you prefer deep-water techniques or shallow-water strategies, Possum Kingdom Lake offers something for every fishing style.
History of Possum Kingdom Lake
Possum Kingdom Lake’s story began in the early 20th century with visions of harnessing the Brazos River for water supply and hydroelectric power. Construction of the Possum Kingdom Dam commenced in 1938, spearheaded by the Brazos River Authority, amidst challenging economic conditions and the looming threat of World War II. The dam was completed in 1941, creating the expansive reservoir we know today.
The name “Possum Kingdom” originates from a local trapper, Ike Sablosky, who supplied possum pelts to the region in the early 1900s. His success led to the area becoming known as “Possum Kingdom,” a name that stuck even after the lake’s creation.
Initially, the lake served primarily as a water source for agricultural irrigation and municipal use. However, its recreational potential quickly became apparent, transforming it into a popular destination for boating, water sports, and, of course, fishing. Over the decades, Possum Kingdom Lake has evolved into a vital economic engine for the surrounding communities, attracting tourists and supporting local businesses.
Target Species at Possum Kingdom Lake
Possum Kingdom Lake teems with diverse fish, notably Largemouth and Striped Bass, attracting anglers. Over 400 Largemouth Bass and 200 Striped Bass have been reported caught!
Largemouth Bass Fishing
Largemouth Bass are a premier target for anglers at Possum Kingdom Lake, offering thrilling sportfishing experiences. As of March 9th, 2026, bass are exhibiting post-spawn patterns, meaning they’re transitioning from breeding and seeking recovery. This period presents unique opportunities for successful angling.
Understanding these seasonal shifts is crucial. During the spring, focus on areas near spawning grounds and transition zones. Later in the year, bass will disperse and seek cooler, deeper waters. Successful anglers adapt their strategies accordingly.
The lake’s structure – submerged timber, rocky points, and creek channels – provides excellent habitat for Largemouth Bass. Targeting these areas consistently yields positive results. Remember to explore varying depths and cover types to locate active fish. Patience and persistence are key to unlocking the lake’s bass fishing potential.
Seasonal Bass Fishing Patterns
Possum Kingdom Lake’s Largemouth Bass exhibit distinct patterns throughout the year, influencing their location and behavior. Currently, in early spring (as of March 9th, 2026), the post-spawn phase is dominant. Bass are recovering from breeding and often hold near spawning areas, becoming more aggressive feeders.
As water temperatures rise, bass transition to deeper structures like submerged timber and rocky points. Summer patterns involve early morning and late evening activity, seeking cooler temperatures. Fall brings a flurry of feeding as bass prepare for winter, often found chasing baitfish in creek arms.
Winter sees bass slowing down and congregating in deeper water. Understanding these seasonal shifts is vital for consistent success. Adjusting techniques and lure presentations based on the time of year dramatically increases your chances of landing a trophy Largemouth.
Best Lures for Largemouth Bass
Selecting the right lure for Possum Kingdom Lake’s Largemouth Bass depends on seasonal patterns and water conditions. During the post-spawn period, reaction baits like spinnerbaits and crankbaits excel at covering water and triggering strikes from aggressive fish.
Texas-rigged plastics, Carolina rigs, and jigs are effective throughout the year, particularly around structure. When bass are holding deep, a drop-shot rig can be deadly. Topwater lures, such as buzzbaits and frogs, are productive during low-light conditions in warmer months.
Matching the hatch – imitating the prevalent baitfish – is crucial. Consider using lures that mimic shad or crawfish. Experiment with different colors and retrieve speeds to find what the bass prefer on any given day. Don’t underestimate the power of a classic plastic worm!
Striped Bass Fishing
Possum Kingdom Lake is a renowned destination for Striped Bass, offering thrilling angling experiences. Currently, Stripers are reported as fair, holding in depths of 30-40 feet. Live bait is proving more effective than artificial lures at this time, indicating a preference for natural forage.
Target areas with submerged structure and points, as Striped Bass often congregate around these features. Trolling deep-diving crankbaits or using large swimbaits can be productive techniques. Remember that Striped Bass are schooling fish, so locating one often means finding many.
Early morning and late evening hours are prime times to target these aggressive predators. Keep an eye out for surface activity, as Stripers frequently feed near the surface, especially during low-light conditions.
Striped Bass Spawning Runs
Possum Kingdom Lake doesn’t have a traditionally defined, predictable Striped Bass spawning run like some other Texas lakes. However, increased activity and concentration of fish occur during cooler months, resembling pre-spawn staging. Anglers observe heightened Striper presence in specific areas as water temperatures fluctuate.
Focus efforts near creek channels and river inflows, as these areas often attract Stripers preparing for spawning. While not a distinct “run,” these locations become hotspots for locating larger concentrations of fish. Look for areas with current and structure, as these provide ideal conditions for Stripers to hold.
Understanding that the spawn isn’t a concentrated event means adapting techniques. Slow-trolling live bait or presenting large swimbaits can entice strikes from pre-spawn Stripers. Patience and exploration are key to success during this period.
Effective Striped Bass Techniques
Possum Kingdom Lake Striped Bass respond well to several techniques. Currently, live bait is outperforming artificial lures, particularly in deeper water (30-40 feet). Slow-trolling live shad is highly effective, presenting a natural food source to aggressive fish.
When targeting Stripers, consider downrigging or using planer boards to cover more water and present baits at various depths. Large swimbaits, especially those mimicking shad, can also trigger strikes, particularly in clearer water conditions. Vertical jigging with heavy spoons or bucktail jigs near structure is another productive method.
Don’t underestimate the power of a full-spread of lines when trolling. Varying depths and colors can help you pinpoint what the fish are keying on. Early morning and late evening hours consistently yield the best results.
White Bass Fishing
Possum Kingdom Lake is renowned for its annual White Bass, or Sand Bass, run. This highly anticipated event occurs in early spring, as the fish leave their winter holding areas to spawn. The current weather conditions are ideal, creating a prime opportunity for anglers.
Locating schools of White Bass often involves searching for areas with flowing water or near creek channels. These fish tend to congregate in large numbers, making for fast-paced action. Small jigs, crankbaits, and spinners are effective lures, mimicking the forage base of shad.
Drifting or slow-trolling through potential holding areas is a proven tactic. Pay attention to your electronics, as large schools will often appear as dense clouds on your sonar. Be prepared for aggressive strikes and enjoy the excitement of the Sand Bass run!
The Annual Sand Bass Run
Possum Kingdom Lake’s celebrated Sand Bass run is now in full swing, drawing anglers eager to participate in this exciting spring event. This annual migration sees White Bass leaving their deeper winter habitats to spawn in the shallower, flowing waters of the lake’s tributaries.
The timing of the run is heavily influenced by water temperature and rainfall. Recent, much-needed rain has created optimal conditions, enhancing the spawning process and attracting large schools of fish. Anglers report excellent catches, particularly during the early morning and late evening hours.
This run isn’t just about quantity; it’s a chance to experience a truly dynamic bite. The White Bass are aggressive and readily take a variety of lures, providing thrilling action for anglers of all skill levels. Don’t miss this premier fishing opportunity!
Locating White Bass Schools
Successfully targeting White Bass during the annual run at Possum Kingdom Lake hinges on locating their schools. Focus your efforts on areas where tributaries feed into the main lake basin, particularly those with rocky or gravel bottoms – preferred spawning grounds.
Utilize your fishing electronics, such as sonar and fish finders, to identify large concentrations of fish. Look for schools holding in depths of 15-30 feet, often near submerged points or creek channels. Pay attention to areas with current; White Bass often congregate where fresh water enters the lake.
Don’t be afraid to experiment with different locations and depths. White Bass schools can move quickly, so be prepared to adjust your strategy. Observing baitfish activity is also a key indicator of where the White Bass are likely to be found.
Fishing Techniques & Strategies
Possum Kingdom Lake demands adaptable approaches; deep water techniques, shallow presentations, and live bait all prove effective.
Artificial lures are also crucial for success when targeting various species.
Deep Water Fishing Techniques
Deep water fishing at Possum Kingdom Lake often centers around locating submerged structure and thermoclines, especially during warmer months. Striped bass, in particular, tend to hold in depths of 30-40 feet, as reported in recent fishing reports. Effective techniques include utilizing downriggers to present live bait or artificial lures at precise depths.
Slow-trolling crankbaits or spoons can also be highly productive. Jigging spoons or Texas-rigged worms near underwater points, humps, or creek channels is another proven method. Pay close attention to your fish finder to identify schools of baitfish, as predator fish will often congregate nearby. Utilizing heavier line and tackle is recommended to combat the deeper water and larger fish commonly found in these areas. Remember to adjust your presentation based on water clarity and temperature.
Shallow Water Fishing Techniques
Shallow water fishing at Possum Kingdom Lake excels during spring, particularly during the post-spawn period for Largemouth Bass. Focus on areas with vegetation, rocky shorelines, and submerged timber. Topwater lures, such as buzzbaits and poppers, can be incredibly effective early in the morning and late in the evening when fish are actively feeding.
Spinnerbaits and shallow-diving crankbaits are also excellent choices for covering water quickly. Texas-rigged worms or creature baits can be fished slowly along the bottom, targeting areas where bass may be holding for cover. When targeting white bass during the annual sand bass run, cast silver spoons or small crankbaits into schools of baitfish. Polarized sunglasses are essential for spotting fish and structure in clear, shallow water.
Using Live Bait
Live bait consistently proves effective at Possum Kingdom Lake, particularly for Striped Bass. Currently, live bait is outperforming artificial lures in deeper water (30-40 feet), indicating its strong appeal. Shad, a primary food source for many species, is an excellent choice; Utilize a Carolina rig or a simple hook and float setup to present the bait naturally.
For Largemouth Bass, nightcrawlers or small minnows fished near structure can yield positive results. When targeting catfish, cut bait or stinkbait are highly recommended. Ensure proper bait storage to maintain freshness and viability. Check local regulations regarding the use of specific live bait species. Remember to handle live bait responsibly and avoid releasing non-native species into the lake.
Artificial Lure Selection
Selecting the right artificial lure at Possum Kingdom Lake depends on the target species and current conditions. For Largemouth Bass during the spring post-spawn, crankbaits, spinnerbaits, and plastic worms are productive choices. Focus on areas near submerged structure and vegetation. When targeting Striped Bass, swimbaits and topwater lures can be effective, especially during low-light hours.
Consider using lures that mimic the size and color of shad, a prevalent baitfish. Experiment with different retrieval speeds and techniques to determine what triggers strikes. Don’t overlook the versatility of jigs, which can be fished at various depths. Matching the hatch – selecting lures resembling the current forage – significantly increases your success rate. Always have a variety of lures to adapt to changing conditions.
Understanding Possum Kingdom Lake
Possum Kingdom Lake features stained water, currently at 57 degrees, and is 2.78 feet below the normal pool level.
Its topography includes varied structure, influencing fish location and behavior.
Lake Topography and Structure
Possum Kingdom Lake’s unique topography significantly impacts fishing success. The lake is renowned for its steep, rocky banks and numerous canyons, creating diverse underwater structures. These structures provide excellent habitat for various fish species, offering cover and ambush points. Deep underwater canyons and submerged humps are particularly attractive to Striped Bass, while Largemouth Bass favor areas with submerged timber, brush piles, and rocky points.
The varying depths and structural elements necessitate adaptable fishing strategies. Anglers should focus on locating these key structural features using sonar or by studying lake maps. Understanding how these structures influence fish movement and feeding patterns is crucial for consistently locating and catching fish. The lake’s complex structure also means that fishing conditions can change rapidly, requiring anglers to adjust their techniques accordingly. Exploring different areas and depths is key to unlocking the lake’s full potential.
Water Clarity and Temperature
Possum Kingdom Lake’s water clarity and temperature play a vital role in fish behavior and fishing success. Currently, as of March 9th, 2026, the water is described as “stained,” indicating reduced visibility. This condition influences how fish locate prey and react to lures. Lower visibility often favors brighter, more vibrant lures that create stronger vibrations to attract attention.
The water temperature is currently 57 degrees Fahrenheit. This temperature is significant as it relates to the post-spawn patterns of Largemouth Bass and the ongoing Sand Bass run. Warmer temperatures will encourage increased fish activity, while cooler periods may cause them to seek deeper, more stable environments. Monitoring these fluctuations is crucial for adapting fishing strategies. Understanding the interplay between clarity, temperature, and fish behavior is essential for maximizing your catch rate at Possum Kingdom Lake.
Current Fishing Conditions & Reports
Fishing at Possum Kingdom Lake is currently rated as good, with high activity and a favorable bite score. Striped Bass are biting in deeper waters!
Recent Fishing Reports (as of 03/09/2026)
Recent reports indicate a strong bite at Possum Kingdom Lake, aligning with the peak of the annual Sand Bass run. Anglers are successfully targeting White Bass as they leave their winter holding areas, drawn by the warming spring temperatures. The early morning and post-sunset hours continue to yield the best results for both Striped and Largemouth Bass.
Water conditions are currently described as stained, with a temperature of 57 degrees Fahrenheit and the lake level sitting at 2.78 feet below the full pool. While live bait is proving effective for Striped Bass in 30-40 feet of water, anglers are also experiencing success with various artificial lures. Expect a brief pause in weekly reports as details are finalized to enhance future fishing hole information.
Overall, conditions are exceptionally promising for a variety of species, making this an ideal time to fish Possum Kingdom Lake. Numerous reports confirm catches of large Stripers and Black Bass.
Solunar Forecasts for Possum Kingdom Lake
Solunar forecasts for Possum Kingdom Lake, as of today, March 9th, 2026, indicate a period of high fishing activity. The current bite score is exceptionally favorable, suggesting prime conditions for anglers targeting various species. Major and minor periods are influencing fish behavior, creating windows of increased feeding activity.
Specifically, the forecast highlights increased activity around sunrise and sunset, aligning with recent fishing reports detailing success during these times. These periods correspond with optimal times for both Largemouth and Striped Bass, as well as the ongoing White Bass run. Anglers should concentrate their efforts during these peak times to maximize their chances of a successful catch.
The solunar influence, combined with the current water conditions and seasonal patterns, paints a positive outlook for fishing at Possum Kingdom Lake. Consistent monitoring of these forecasts will further refine angling strategies.
Essential Gear & Equipment
Anglers require quality rods and reels, alongside appropriate fishing line for Possum Kingdom Lake.
Essential accessories include tackle, bait, and tools for a successful fishing experience.
Rod and Reel Recommendations
Selecting the right rod and reel is crucial for success at Possum Kingdom Lake, given the variety of species and fishing techniques employed. For Largemouth Bass, a medium-heavy power spinning or baitcasting rod, 6’6” to 7’3” in length, is highly recommended. These rods offer the versatility needed for casting various lures and handling larger fish. Pair this with a baitcasting reel in the 6.4:1 to 7.1:1 gear ratio, or a spinning reel with a smooth drag system.
When targeting Striped Bass, a heavier setup is necessary. A medium-heavy to heavy power rod, 7’ to 8’ long, is ideal for casting heavier lures and fighting these powerful fish. A baitcasting reel with a higher gear ratio (7.1:1 or higher) will help retrieve line quickly. For White Bass during the annual run, a lighter action spinning rod, around 6’ to 6’6”, is sufficient. Consider a reel with a quick retrieve to keep pace with active schools of fish. Don’t underestimate the importance of quality components – durable guides and a comfortable grip will enhance your overall fishing experience.
Recommended Fishing Line
Choosing the appropriate fishing line is paramount for optimal performance at Possum Kingdom Lake. For Largemouth Bass fishing, fluorocarbon line in the 12-20lb test range is an excellent choice due to its low visibility and abrasion resistance, especially around submerged structure. Braided line (30-50lb test) offers superior sensitivity and strength for techniques like flipping and pitching. When pursuing Striped Bass, braided line with a fluorocarbon leader is highly recommended. The braid provides strength for battling these powerful fish, while the fluorocarbon leader minimizes visibility.
For White Bass during the Sand Bass run, 6-8lb test monofilament line is sufficient, offering good knot strength and affordability. Consider using a high-visibility line, like chartreuse, to help detect subtle strikes. Regardless of the species targeted, regularly inspect your line for abrasions and replace it as needed to maintain optimal performance and prevent break-offs. Line capacity is also important; ensure your reel is spooled adequately for the conditions.
Must-Have Fishing Accessories
A well-equipped tackle box is essential for a successful fishing trip to Possum Kingdom Lake. Polarized sunglasses are crucial for reducing glare and spotting fish in the clear water. A reliable pair of pliers or forceps is needed for hook removal and handling fish safely. Don’t forget a fish gripper for securely holding larger Striped Bass for photos. A quality line clipper or scissors is vital for trimming line efficiently.
Essential accessories also include a tackle bag to organize lures and gear, a waterproof bag for electronics, and a first-aid kit for minor injuries. A portable fish finder can significantly improve your chances of locating fish schools, especially for Striped and White Bass. Finally, a measuring tape or board is necessary to ensure you comply with Texas fishing regulations regarding size limits. Sunscreen and a hat are vital for protection from the elements.
Regulations & Licensing
A valid Texas fishing license is required to fish at Possum Kingdom Lake. Be sure to check for lake-specific regulations regarding size and bag limits for all targeted species.
Texas Fishing License Requirements
To legally fish in the waters of Possum Kingdom Lake, and throughout Texas, most anglers aged 17 and older are required to obtain a valid Texas fishing license. Several license options are available, catering to different fishing durations and angler preferences. A Freshwater Fishing License is the standard choice for those primarily fishing in inland lakes and rivers like Possum Kingdom.
Annual licenses offer a cost-effective solution for frequent anglers, while short-term licenses (e.g., 1-day, 7-day) are ideal for visitors or occasional fishing trips. Certain exemptions apply, including for individuals under 17, those with disabilities, and active-duty military personnel. It’s crucial to carry your fishing license with you while fishing and present it upon request by a Texas Game Warden. Licenses can be conveniently purchased online through the Texas Parks and Wildlife Department (TPWD) website, at authorized retailers, or through the TPWD mobile app. Always verify the most up-to-date licensing requirements and regulations before heading out to fish.
Possum Kingdom Lake Specific Regulations
Possum Kingdom Lake adheres to statewide Texas fishing regulations, but also features some specific rules to protect its unique fishery. Currently, there are no explicitly stated unique regulations beyond the general statewide rules. However, anglers should always consult the Texas Parks and Wildlife Department (TPWD)’s current Freshwater Fishing Statewide Regulations guide for the most accurate and up-to-date information.
Regarding Largemouth Bass, standard size and bag limits apply. Striped Bass regulations can fluctuate based on population assessments, so checking for any recent changes is vital. Pay close attention to any specific restrictions regarding the use of certain baits or fishing methods. It’s essential to be aware of any designated fishing areas or restricted access zones within the lake; Responsible angling practices, including catch-and-release where appropriate, are encouraged to maintain the health of the Possum Kingdom Lake ecosystem. Always prioritize conservation and respect the environment.